
Introduction
Skid steers are among the most useful grading machines available to small contractors, landscapers, farms, and property owners because they combine compact size with the ability to switch between buckets, land planes, box blades, grading scrapers, and rakes. Whether the goal is rough site prep, driveway repair, pad preparation, or final land leveling, the machine can perform well when the operator pairs the right attachment with a consistent technique. Poor grading results rarely come from the machine alone. They usually come from attachment mismatch, rushed passes, and a lack of finish strategy.
A bucket can do a surprising amount of rough work, but fine grading often improves dramatically when the operator moves to more specialized tools such as a land plane, grading scraper, or box blade. Rakes become valuable during final surface preparation when rocks, debris, and uneven texture must be removed or loosened. For Machinery.org readers, the key lesson is that grading is a process with stages. Rough grading, finish grading, and final prep each ask for slightly different techniques.
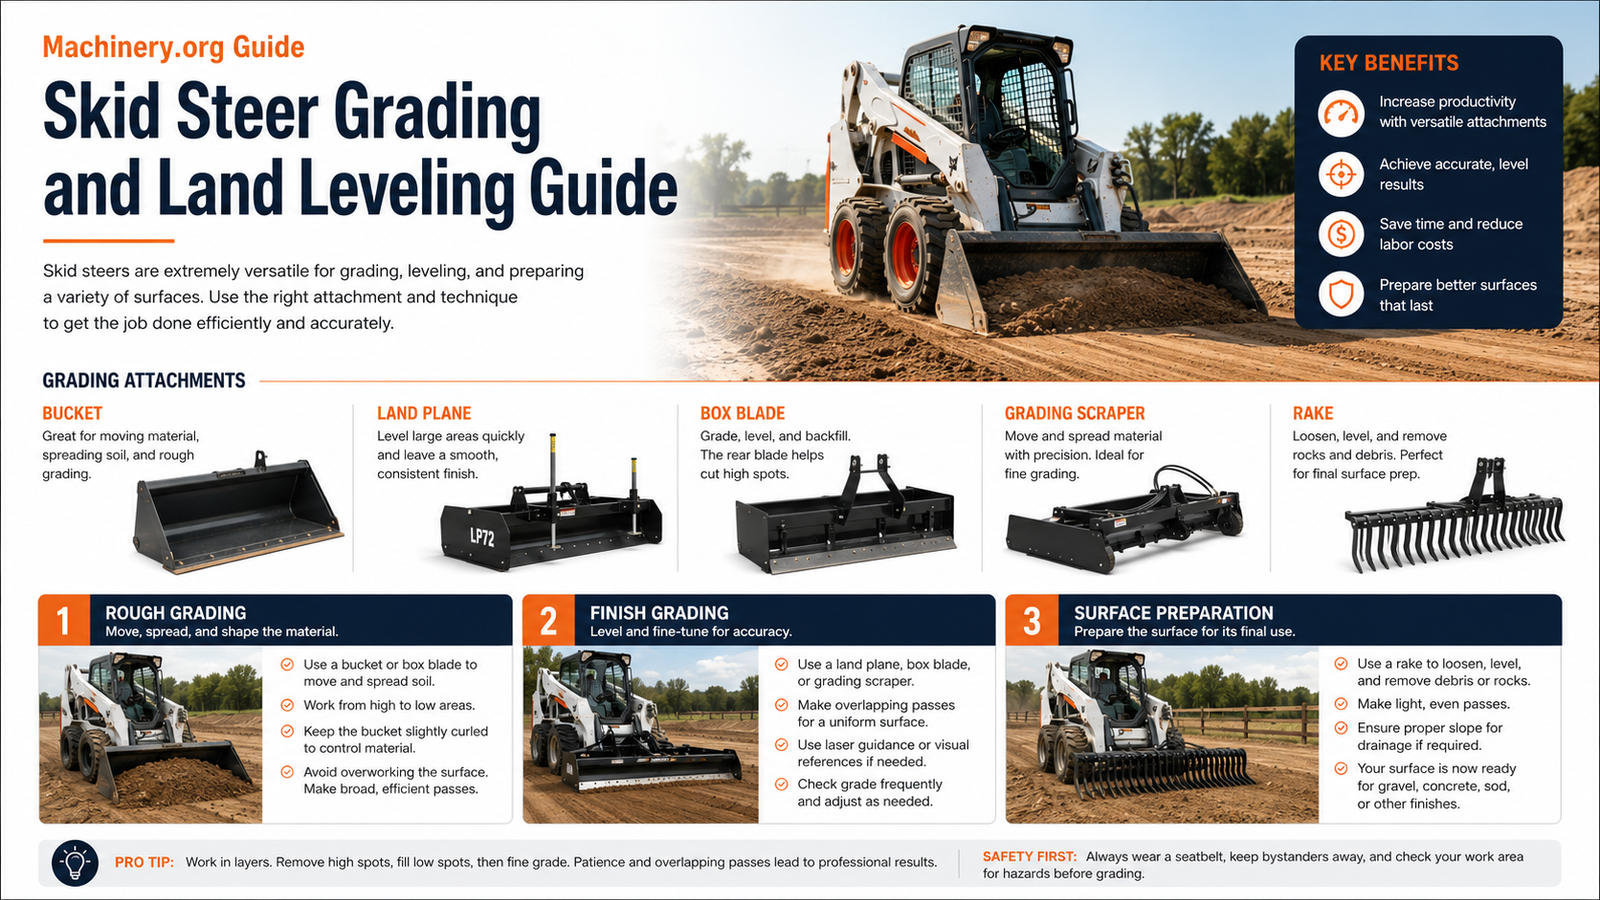
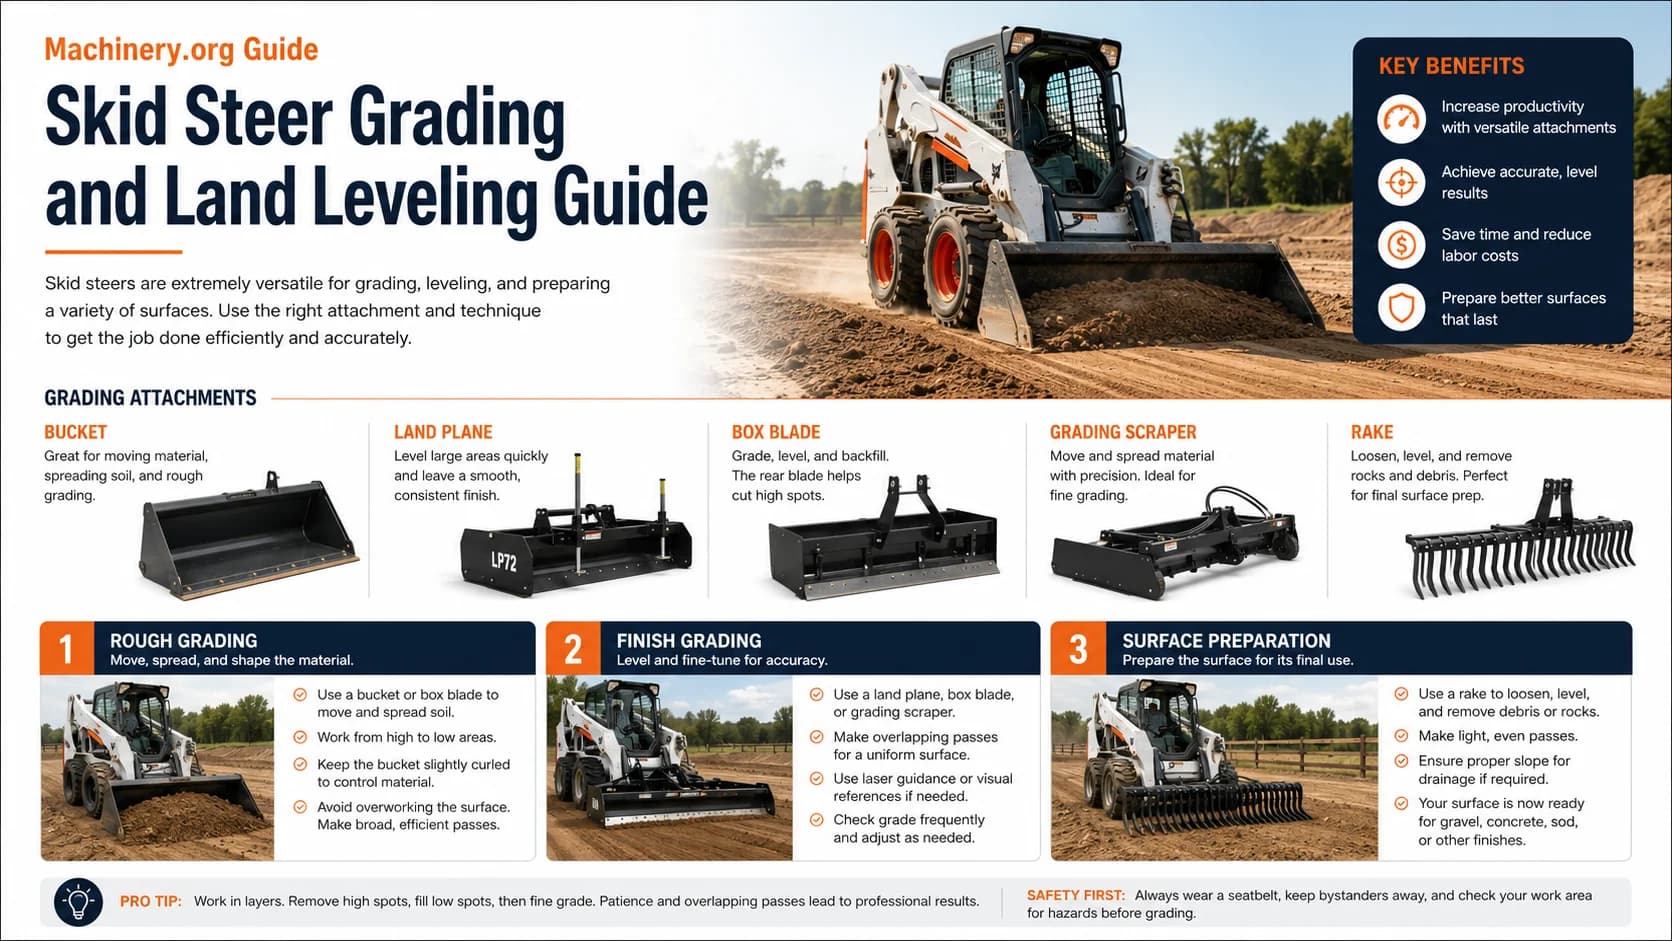
Figure 59.1 – Skid steer grading and land leveling guide.
Image Description: A grading guide infographic showing common grading attachments and a three-stage workflow for rough grading, finish grading, and surface preparation.
Choosing the Right Grading Attachment
Buckets are excellent for moving and spreading material. Land planes are efficient for smoothing larger areas. Box blades can cut high spots and help shape grade changes. Grading scrapers are useful where material must be spread accurately with more finish control. Rakes loosen, collect, and level surface debris before the area receives gravel, sod, or other finishing materials. The best operators do not force one attachment to do every job. They move through the work in stages and change tools when surface expectations change.
Use a bucket for initial spreading and rough shaping of loose material.
Use a land plane or grading scraper when the goal is a flatter, more consistent finish.
Use a box blade to cut down high areas, backfill low areas, and refine transitions.
Use a rake for debris removal, final texture management, and last-stage prep.
Technique Matters More Than Speed
Successful grading depends on thin, controlled passes. Operators who attack the surface too aggressively often create washboards, ridges, and unnecessary rework. Working from high to low, overlapping passes slightly, checking the grade often, and making small angle adjustments are much more effective than trying to finish in one heavy pass. Soil moisture also matters. Very wet soil can smear, and very dry material may not compact or shape evenly. Good finish work is more about control than force.
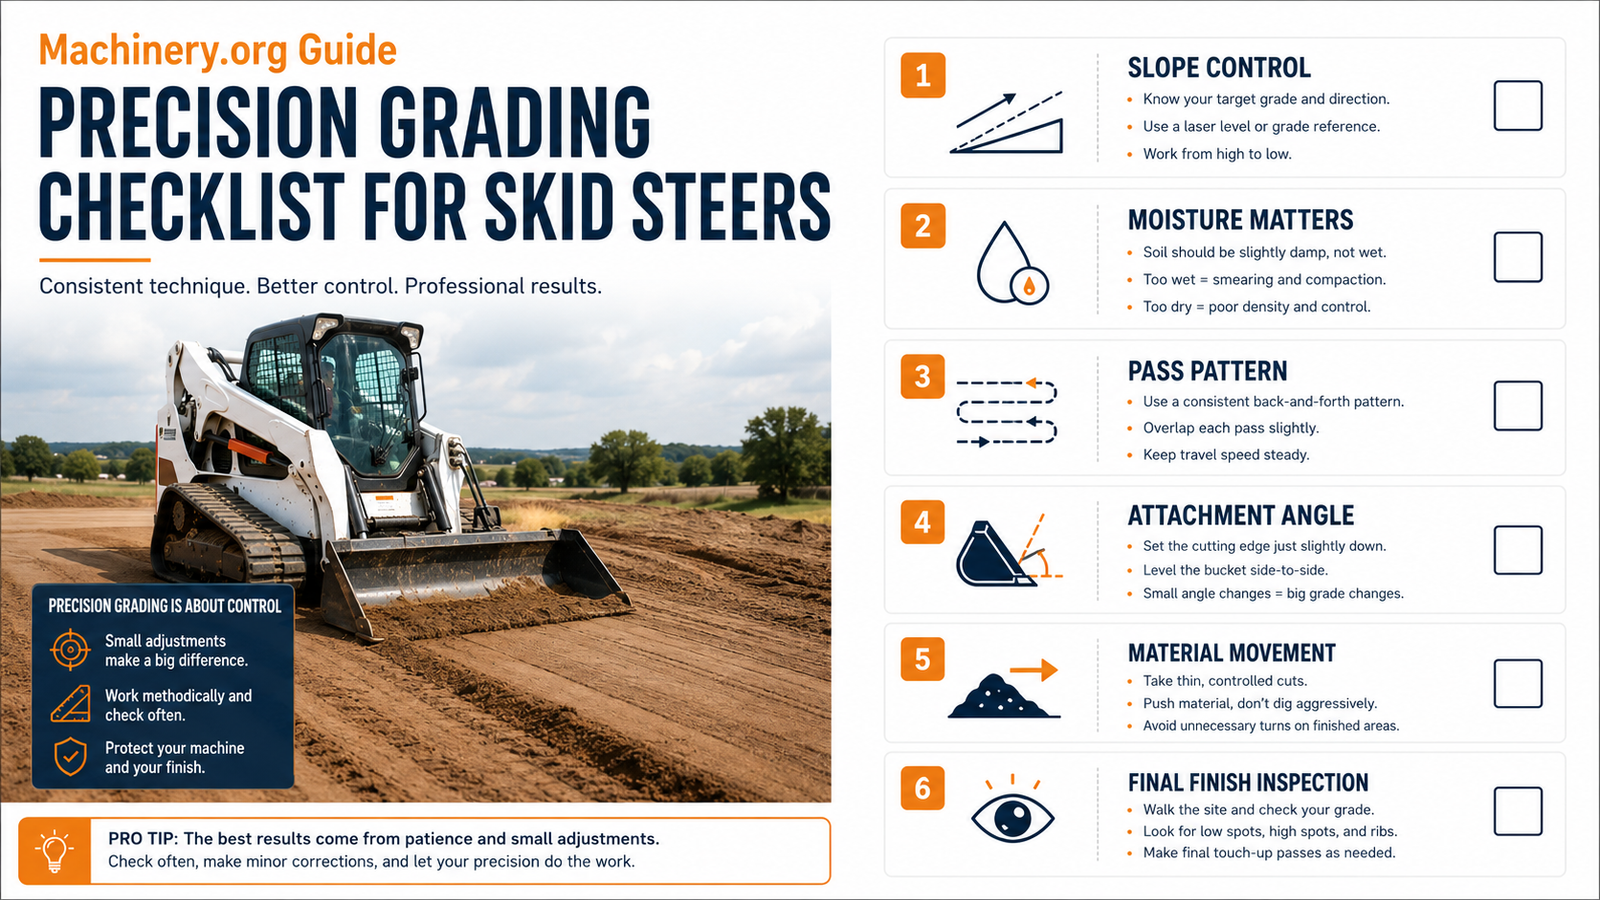
Figure 59.2 – Precision grading checklist for skid steers.
Image Description: A grading checklist graphic showing key checkpoints such as slope control, moisture, pass pattern, attachment angle, and final inspection.
Building a Grading Workflow
A simple grading workflow starts with rough spreading and shaping, followed by broad leveling passes, followed by more careful finishing and inspection. At each stage the operator should step back, walk the surface, and identify low spots, high spots, or drainage issues. If the area needs slope for runoff, it is important to work with a visible reference or measured benchmark rather than judging by eye alone. On professional jobs, that discipline helps prevent callbacks and keeps the final surface aligned with the intended use.
Common Grading Mistakes
A common mistake is trying to use a general-purpose bucket for fine finish work without adjusting technique. Another is making uneven turns on a partially finished surface, which can damage the grade and force extra passes. Some operators fail to inspect the work from the ground often enough, while others forget that the finished surface may later receive gravel, concrete, or sod and therefore needs the proper crown, slope, or smoothness. Good grading is not only about making the dirt look neat; it is about preparing the surface for its final function.
Practical Tips for Better Results
Work in layers and avoid taking large aggressive cuts once the finish stage begins.
Overlap passes slightly to blend lines and reduce ridges.
Keep speed steady and attachment angle consistent.
Inspect the surface on foot and correct problems while they are still small.
Choose the finishing attachment that matches the surface expectation, not just the attachment already on the machine.
Frequently Asked Questions
Can I grade effectively with only a bucket?
Yes, especially for rough grading and material spreading, but specialized tools such as land planes, grading scrapers, and rakes usually improve finish quality and reduce time on fine grading work.
What is the biggest operator mistake in grading?
One of the biggest mistakes is moving too much material too quickly. Fast, aggressive passes often create ridges, washboards, and rework.
When should I use a rake?
A rake becomes useful during surface preparation and cleanup, especially when you need to remove rocks, debris, and uneven texture before a final finish such as gravel or sod.
Key Takeaway
Good grading results come from the right attachment, thin controlled passes, and frequent inspection. Treat grading as a staged process and the surface quality will improve while rework declines.
Get More Expert Guides & Updates
Subscribe for Machinery.org guide updates and product learning content.